显示标签为“epson inkjet printer”的博文。显示所有博文

2018年8月22日星期三

How to Replace Epson Ink Cartridges? - These Steps Tell You Clearly

Hi~ Nice to see you again, dear friends. It will heavy rainy in Nanjing. The sky is black. Today's topic that I will share you about how to replace epson ink cartridges. Epson printers are all mostly diverse in that no two models are designed to function in the same way, though similar product lines will share component pieces designed to encourage their intended use. The same applies to Epson ink cartridges, which will vary in their ink capacity and composition, though they are usually around the same size and shape. Today I will tell you how to replace epson ink cartridges. If any step doesn’t match up with what you’re seeing with your model, consult your owner’s manual for more precise details and instructions.

1. Checking the dye Ink Levels
If your printer isn’t alerting you to replace any cartridges and you wish to know which cartridges need replacing, you can check your printer’s ink levels by following these steps:

  • Press the Home Button (HOUSE icon).
  • Go to Setup then hit the OK button.
  • You’ll see Ink Levels as the first option so simply hit the OK button.
  • You can now see your printer’s ink levels on the LCD screen.
B. Installing New Epson Ink Cartridges
Before you begin, it’s important that you have your replacement cartridges on hand before you remove the empty ones. Leaving your print head exposed to open air can lead to clogs that are difficult to clean, and may result in the need for replacement.

1. Turn on your printer unit using the power button.
2. If you already have empty cartridges, you will see a message on your LCD screen noting which cartridges need replacement. Hit “PROCEED” and follow the instructions on the screen.
3. If you are replacing a cartridge before it is empty:
  • Press the Home button (HOUSE ICON).
  • Go to Setup then hit OK.
  • Scroll to Maintenance then hit OK.
  • Scroll to Ink Cartridge Replacement then press OK.
4. Lift up the scanner unit (not just the scanner cover), to expose the ink cartridges.
5. Wait for the printhead to stop before taking out the cartridges.
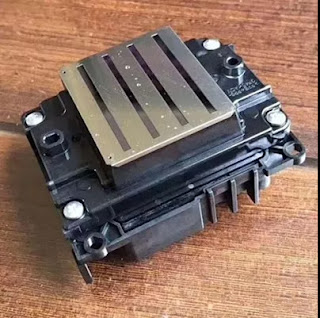
6. IMPORTANT: Be careful NOT to TOUCH the printhead and the flat white cable inside the printer.

7. Squeeze the tab at the back of the cartridge you want to replace toward you and pull the cartridge straight up. It should slide out easily with a little wiggling at most. Be careful when you handle the spent cartridge, as leftover ink residue can stain your clothing, furniture, carpet, or hands. If you get ink on your hands, wash it thoroughly with soap and water. In the event ink sprays into your eye, flush it with cool water until clean. Keep ink cartridges out of the reach of children for all the reasons listed above.

8. Gently shake your replacement cartridge up and down four or five times while it’s still in its sealed wrapper. Shaking helps redistribute the ink throughout the cartridge if it has settled.
9. Remove it from the plastic package.
10. Remove the yellow tape that seals the cartridge. This yellow tab is the only thing you should take off. DO NOT take anything else off.
  • Do not remove the other seals as this will result in leaking.
  • Do not touch the green chip on the cartridge.
  • Do not remove the label.
11. Insert the cartridge straight down into the carriage until it clicks. Repeat process for any other cartridges in need of replacement.
12. Close the cartridge cover. Select “CHECK” on the LCD screen to make sure the cartridge is installed correctly. If so, close the scanner lid.
13. Your printer unit will automatically start priming the new cartridge. Priming should take a few minutes. Once completed, you will see a message on your LCD screen saying that your printer is ready to print!

It’s important to note that installation instructions for some Epson inkjet printers might differ but they will follow the same basic steps.

In the end, if you want know more about epson inkjet printer or other brand printers, please welcome to contact us at any time. We will provide you the best quality product and service. Hope my article can be useful to you. Thank you for your reading.

2018年7月5日星期四

How to Clean Clogged Epson Printer Ink Cartridges? - There are 8 Steps!

Hi~ good afternoon, my dear friends! Today, let me talk about how to clean Ink cartridges. Because EPSON printer Ink cartridges sometimes get clogged with dried ink, especially if you have not used your printer for a long time. I recommend that you remove clogged ink cartridges and wipe off dried ink with a damp cloth. After you manually clean the ink cartridges, the printer performs an automatic cleaning cycle to eliminate remaining debris.

HOW TO CLEAN CLOGGED INK CARTRIDGES?
Step 1
Power on your epson inkjet printer and open the lid to automatically move the ink cartridge cradle toward the center of the machine. Disconnect the printer from the electrical outlet.

Step 2
Squeeze the tabs on the front and back of the ink cartridge, and then lift it out of the printer.
Step 3
Moisten a lint-free cloth with distilled water. Wipe the copper-colored circuit strip on the back of the ink cartridge with the cloth. Wipe with an upward motion, but do not touch the nozzle end or the nozzle plate. Remove any excess moisture with a dry cloth.
Step 4
Dampen a cloth and wipe the electrical contacts and copper strip located inside the ink cartridge cradle.

Step 5
Hold the ink cartridge by its color cap. Remove any dried ink from the cartridge nozzle with a damp cloth.
Step 6
Reinsert the cleaned ink cartridge into the cradle and press down so it locks in place. Repeat the cleaning process with the other ink cartridge, if necessary.
Step 7
Close the printer lid and reconnect the power cable to an electrical outlet. Turn the printer on. The EPSON printer manager window opens and the printer goes through a start-up sequence as it adjusts the ink cartridges.

Step 8
Select "Settings | Settings and Maintenance | Maintenance | Clean Print Cartridge" in the EPSON printer manager window. The printer runs a test sequence, cleans the ink cartridges and prints a test page when finished.

Tip
Don't turn the printer off immediately after printing a document. Doing so may cause the carriage to stop in the center of the printer and allow the ink cartridges to dry out.


Okay, these all above are my share about the steps of cleaning clogged ink cartridge. If you have any other needs or questions welcome to contact us at any time. We will provide you the best quality product and service. Hope my article can be useful to you. Thank you for your reading.

Nanjing Feiyue paper Industrial Co.,ltd
www.feiyuepaper.com
Email: sales@feiyuepaper.com
jenny@feiyuepaper.com
Whatsapp: +8618755150383

What is Epson 4720 Printhead? It Can Replace 5113 Print Nozzle?

Hello, nice to see you again, my dear friends. It will rainy in Nanjing, the sky is dack, wind is heavy. Now I will tell you the topic is a...