Hi, Nice to see you. In China, the summer has passed and the weather is getting colder and colder. When the season changes people also need to change their wearings. Same to this, when the weather getting cold we should also pay attention to our digital inkjet printer. So as a most important part of the digital inkjet printer, do you know how to maintain the print head when temperature is getting cold. Then I will share you about some tips that maintain your print head in the cold temperature. Read the following and get to know more.
1.The temperature below 10℃
The printer will appear blurry ghosting phenomenon, which is made virtual and ink print head caused by poor fluency.
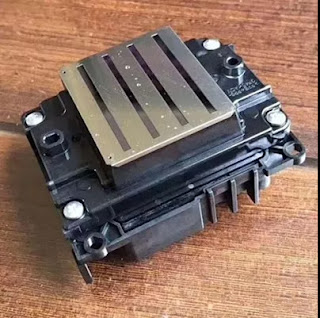
Ways: open heating or heat lamp to keep the ink flowing(15℃~35℃). The print blurred, with a hairdryer blowing print head (1-2) minutes,blowing position in the print head side, which is encoded by side as shown in the print head,even blowing about can be solved.
2.Before the holidays to clean ink stack
Comprising: a blade, ink around the ink pad, ink mud clean;bearing,track,on a small amount of gear oil or lubricants. Done more than you can make a test strip, no problem to put around the bottom of the ink print head are clean, and let the print head back to the warehouse with the ink-pad overlap,you can shut down!
3.After holiday back not the first time boot.
Because inside the ink tube and print head ink may have icing, then we want to raise the room temperature to about 20℃ degrees, put 2-3 hours, and then observe the status of the ink tube and print head, if then not necessary,place a litter longer time, you want the job inside the ink is completely thawed, then duct blowing about sprinklers.
Focus: After thawing ink to stand for 24 hours in order not to affect the print ( fluency in 15 celsius to 35 degrees celsius).
These all above are my share about the tips that you should pay attention to about how to maintain your print head when temperature is getting cold. We are a professional sublimation digital printing and transferring material manufacturer in China. So if you have any needs or questions welcome to contact us at any time. We will provide you with the best quality product and service. Hope my article can be useful to you. Thank you for your reading.
Nanjing Feiyue Digital Technology Co.,ltd
www.heatsub.com
Facebook: Zeo
Whatsapp:+8618752006819
Skype:+8618752006819
显示标签为“print head of the digital printer”的博文。显示所有博文
2017年9月29日星期五
2017年9月26日星期二
Some Tips That You Should Know How to Test The New Installing Print Head for Your Inkjet Printer
Hi, Nice to see you. When we buy a new print head for our digital printer such as the 5113 or DX-5 print head we may always need to have a test for it. So that we make make sure if the print head has high quality . But do you know how to test the new print head in a right way and what should you pay attention to when you install and test it? Read it and get to know more.
Installing of The Print Head
Install the nozzle also be careful, must first power off, and put in place. After installed, use hands to push the car and move around, check whether smooth, do not install on electricity, because, if the head is not in place, the car is easy to hit a head and hand feeling, fragmentation, and freely, strong control ability;
Do not take the ink when you connect the plug and cable, and make sure you have good contact with the socket, do not touch the foot, otherwise it will cause the nozzle to short-circuit and burn;
Attention
The head of the nozzle is very fragile, absolutely can not bump, be sure to protect. Its surface is a piece of aluminum, the inner layer coated with a crystal oscillator and very small ink tube. A touch will be concave, deformation, and even broken, so that the nozzle on the scrapped.
After Install Your Print Head
Just installed sprinklers inside there will be air, so it will not immediately print normal, only the head of the air is completely discharged to normal Qi lines; the specific steps are as follows:
First, the available batch cleaning (only one time for cleaning 2 times, then stop for 30 minutes washing 2 times) repeatedly kept cleaning excessive, will cause the ink cleaning pump, not only make the printing color mixing, ink leakage and waste ink;
Secondly, you can print more pictures, so that the nozzle in the work out of the air;
Again, if the machine has caused the waste ink tube to first turn off, then the barrel of a rubber tube out of the waste ink tube until 3-5ML ink, then boot, a normal washing machine, equal to the value of the air is difficult to pull out, side effects It is likely to cause the cleaning pump to piling.
These all above are my share about how to install your new print head and some tips that you should pay attention to when test it. If you have any needs or questions welcome to contact us at any time. We will provide you with the best quality product and service. Welcome to contact us at any time. Thank you for your reading.
Nanjing Feiyue Digital Technology Co.,ltd
www.heatsub.com
Facebook: Zeo
Whatsapp:+8618752006819
Skype:+8618752006819
订阅:
评论 (Atom)
What is Epson 4720 Printhead? It Can Replace 5113 Print Nozzle?
Hello, nice to see you again, my dear friends. It will rainy in Nanjing, the sky is dack, wind is heavy. Now I will tell you the topic is a...
-
Hello, nice to see you again, my dear friends. It will rainy in Nanjing, the sky is dack, wind is heavy. Now I will tell you the topic is a...
-
Hi~ nice to see you again, my dear friends. The National Day will coming! So from tomorrow to 7th October, I am in holiday. And today's...
-
Hi! Nice to see you again, my friends. Today, let's talk about how to clean epson nozzles . No matter if you use branded, compatible or ...


